แสดงบทความที่มีป้ายกำกับ linux แสดงบทความทั้งหมด

วันศุกร์ที่ 31 ธันวาคม พ.ศ. 2553

AriOS

AriOS is the successor of mFatOS, an Ubuntu remaster we talked about a while back. AriOS 2.0 was released today and it's based on Ubuntu 10.10 - the new version tries to replicate Unity but as opposed to Unity, it's customizable thanks to Avant Window Navigator. In AriOS, everything works out of the box and most popular applications are installed by default which I'm sure those with a limited Internet connection will appreciate.


First impressions / looks

The AriOS interface is inspired by Unity but instead of the Unity "dock" it uses Avant Window Navigator which is a lot more customizable, with DockBarX for the launcher / task manager. Using AWN, you get all the amazing applets that come with it and DockBarX offers window previews, fancy menus and more.

No, it's not Wingpanel on the top-right corner but another instance of Avant Window Navigator designed to replicate a floating appindicator, but unlike Wingpanel (and unlike Unity), there's also a notification area (systray) available. When maximizing a window, the top-right AWN appindicator/notification area nicely covers the application which gives both a slick look and more screen real-estate.


AriOS themes

The default AriOS theme is a customized blueish Ambiance and the icons are a mod of MeliaeSVG theme. For those who prefer dark themes, AriOS provides a dark version of it's default theme - you can change it from the Appearence Preferences. But that's not all - AriOS comes with all the popular GTK themes installed by default: Orta, Lucidity (and variations), Equinix (and variations), Elementary and of course, icon themes such as: Elementary, Candy and Faenza.

Switch between Avant Window Navigator and classic Gnome panels in seconds


AriOS

AriOS comes with a somewhat unique feature (it seems Ubuntu 11.04 will also have something that will let you chose): by default, it uses Avant Window Navigator instead of the classic Gnome panels but if you open a terminal and type "gpanel", then log out and log back in, AWN will be replaced by the Gnome panels. If you want to go back to using Avant Window Navigator, open a terminal again and type "awn", then log out and log back in.


Default applications


AriOS

Because AriOS is designed to be a Linux distro / remaster that you can use right away, it comes with all the cool applications that most blogs write about these days: Synapse, Nautilus Elementary, Kazam (screencast tool), Ubuntu Tweak, Grub Customizer, PhotoFilmStrip, Gloobus Preview, Granola as well as two browsers: Firefox and Chrome and Clementine for the music player (but Rhythmbox is also available). Other default applications include: gThumb, Shutter, TrueCrypt, Thunderbird, Empaty, Uget, Transmission, NTM, Geany, Cheese, Brasero, Arista Transcoder, Wine, our very own Y PPA Manager and more.

Since now everybody uses Twitter / Identi.ca, AriOS has this covered too by including the most popular Twitter client for Linux: Hotot.

For a video player, AirOS comes with the application everybody uses (yet it's not default in any Linux distribution): VLC (but Totem and Smplayer are also available). Image editing is also covered for both the novice and advanced: GIMP, Inkscape and Pinta are all installed by default.

And since no OS is ready to use out of the box without codecs, you'll be glad to know AriOS comes with everything you need to play almost any audio or video files. Further more, for those who don't have full internet access, AriOS comes with offline installer for proprietary Nvidia and ATI (AMD) graphics drivers (simply double click the icon on the desktop).


Tweaks


AriOS

I was telling you about a tweak easily switch to Gnome panels - that's not the only one included in AriOS. Some other tweaks can be applied manually - these are usually things only advanced users do, but thanks to AriOS, everyone can fix the Plymouth for restricted graphics drivers or install a "200 lines" patched custom kernel.


Included "manual" tweaks:

- Install the "200 lines patch" Linux Kernel without downloading it: simply open a terminal and type "magic".
- Fix the Plymouth for proprietary Nvidia and ATI graphics drivers: the script we've written about a while back is included in AriOS - to apply it, open a terminal and type "fixplymouth".
- Gimpbox (single window Gimp for the stable Gimp version) is yet another script included by default - to run it, type "gimpbox".

Some further tips and tricks can be found inside the "Tips.pdf" file in the Help folder (you can find it on the desktop). Here, you'll also find some further info on AriOS as well as some video tutorials.


Those are of course tweaks you can apply yourself but a lot of tweaks are already applied by default. For instance, since the default interface uses AWN without any Gnome Panels, the Gnome Run dialog can't work but AriOS has Synapse binded to the ALT + F2 keys (as well as ALT + SPACE) so only the looks change, the functionality is the same. To discover all the tweaks in AriOS, try it for yourself!


Downsides? There's only one to AriOS: the large number of default applications, many of which serve the same purpose. While that's great for those with no / limited internet connection, it might be annoying for the rest. On the other hand, if you only want some basic applications installed by default, you would install Ubuntu and not AriOS so the large number of default applications does make sense in a way.


Download AriOS

AriOS comes in two editions: International (English) and Iranian, both for 32bit only for now.

Download AriOS | AriOS website (work in progress)


Update (important!): to be able to use non-english language packs, run the following command:
sudo apt-get install --reinstall locales localechooser-data

Then you can go to the Language Support in the administration menu, install your language and press "Apply System-wide".

วันอาทิตย์ที่ 19 ธันวาคม พ.ศ. 2553

Linux for beginner

What Is Linux?
To some, the first thing that comes in mind when asked this question is "Linux is an operating system." That's not completely false, but neither accurately true. Linux per se is only the kernel of the operating system, the central part of it. A Linux-based operating system comprises of the Linux kernel, the GNU tools and utilities (like the Bash shell, or the GCC compiler), desktop environments (like KDE and GNOME), and finally, all the other applications, graphical or not (like a music player or an image editor).

What you are installing on your computer is called a Linux distribution, or a Linux-based operating system. A Linux distribution takes all the parts mentioned above and assembles them, eventually polishing and customizing them. There are hundreds of good Linux distributions out there, and I couldn't contain all of them here. Some examples include the popular Ubuntu, Debian, openSUSE or Fedora. You can find more information about Linux distributions at DistroWatch or on Wikipedia.

Usually Linux is cost-free, but some companies may charge for it or for support. The kernel and all the GNU tools are licensed under a free, permissive license (the GPLv2 or GPLv3), which allows not only to download freely and redistribute it, but also to study and modify the source code.
Introduction: Basic Commands and Concepts
What is a shell?

A shell is a command interpreter which allows you to interact with the computer. The way things work is pretty simple: you type in commands, the shell interprets them, performs the tasks it was asked to do, and finally it sends the results to the standard output, which is usually the screen. Here's an example output of the ls command, which lists the files in a directory:
debian$ ls
bin dev home media proc selinux tmp vmlinuz
boot etc lib mnt root srv usr initrd.img
cdrom floyd lost+found opt sbin sys var
This is a list of files inside the root directory. The root directory is the first location in the filesystem tree hierarchy, and it is represented by the slash character: /.

Some of the most popular shells are:
  • bash - the Bourne-Again Shell, the default shell on most Linux systems
  • sh - the Bourne Shell, an older shell which is not so widely used anymore
  • csh - the C Shell, which accepts a syntax which resembles the C programming language
  • tcsh - an improved version of the C Shell
  • ksh - the Korn Shell, initially developed in the early 1980s
  • dash - Debian Almquist Shell, a shell created by the Debian distribution
In this tutorial we will focus on Bash, since it is the most widely used and also one of the most powerful shells out there. Bash is a modern implementation of the older Bourne Shell (sh), developed by the GNU project, which provides a huge amount of tools and which, together with the Linux kernel, desktop environments like GNOME or KDE and applications which run on top of them, comprise the whole Linux platform. On a Debian or Ubuntu distribution, the default shell used by the system is specified in the file /etc/passwd (default being Bash).

Starting up a terminal

To access the shell we will use a shell-like application, also called a terminal emulator. There is a huge number of good terminal applications out there, including the default ones in GNOME or KDE, or Yakuake, Guake, rxvt and so on. For now let's just stick with the default that comes with your system. If you're using GNOME you can access the terminal by going to Applications->Accessories->Terminal or pressing Alt+F2 and typing gnome-terminal in the run box that appears, followed by Enter. If you're running KDE you can type instead konsole after pressing Alt+F2.

Depending on your distribution, the prompt may look something like user@host$ . The first part before the ampersand is your login username, and the other one is the hostname of your computer.
Moving Around
What are Linux commands?

Linux commands are executable binary files which can be ran to perform certain tasks, like for example listing the files in a directory running an entire graphical application. Examples of frequently used commands are ls, cd, pwd, date or cat. With the exception of executable files, there is also a category called shell built-ins, which are commands provided by the shell itself (Bash in our case). We'll deal with those later.

The general form of a Linux command is:
command options(s) filename(s)
Which specifies a command, followed by one or more parameters, and optionally one or more files to apply it on. For example:
$ echo -e 'Hello, world!\n'
Will output the text 'Hello, world!' followed by a newline character. The -e parameter (also called argument, or switch in this case) tells the echo command to interpret escaped characters, like the trailing \n, which will add a newline after the text inside the single quotes. Ignore the leading dollar sign, it just signifies the shell prompt.

A command may or may not have arguments. An argument can be an option or a filename.

Moving around using cd and pwd

Usually when you start a terminal the default starting location (called the current working directory) is your home folder, /home/your_username/. Let's say we want to move to the root directory. We will issue the following command:
cd /
As you can see, we used the cd (change directory) command, followed by a single argument, the path where we want to go (the root directory is represented by the slash sign). Now let's vizualize the contents of the root directory using the ls command:
$ ls
bin dev home media proc selinux tmp vmlinuz
boot etc lib mnt root srv usr initrd.img
cdrom floyd lost+found opt sbin sys var
These are all files and directories located in our root folder. If we would've wanted to list the contents of this folder directly from where we were, in the home folder, we would've called ls with a single argument, the slash sign:
$ ls /
bin dev home media proc selinux tmp vmlinuz
boot etc lib mnt root srv usr initrd.img
cdrom floyd lost+found opt sbin sys var
And it would've had the same result.

Now let's go back inside our home directory and list its contents. To do this, we have two options: cd without any parameters always changes the working directory to the home of the current user (unless it is aliased). Alternately, you could type:
$ cd /home/your_username/
And you should be back in your home folder. Don't forget to replace your_username. If you don't know what your username is type echo $USER. On my computer this would output 'embryo', which is the user I'm currently logged in with:
debian$ echo $USER
embryo
Now let's see what the current working directory is. We will use the pwd (print working directory) command to do so:
$ pwd
/home/embryo/
Now let's see the contents of our home directory using the ls command. It should output something like the following (yours may vary):
$ ls
Downloads Music my_stuff textfile
There is more to ls though. Let's say we want to also list hidden files and show detailed information about each separate file. For this we will group several switches and pass them to ls:
$ ls -lha
total 20K
drwxr-xr-x 2 embryo embryo 4.0K 2010-12-19 15:12 Downloads
drwxr-xr-x 2 embryo embryo 4.0K 2010-12-19 15:12 Music
drwxr-xr-x 2 embryo embryo 4.0K 2010-12-19 15:21 my_stuff
-rw-r--r-- 1 embryo embryo 0 2010-12-19 15:21 textfile
drwxr-xr-x 5 embryo embryo 4.0K 2010-12-19 15:32 .
drwxr-xr-x 62 embryo embryo 4.0K 2010-12-19 15:12 ..
-rw-r--r-- 1 embryo embryo 0 2010-12-19 15:32 .bashrc
We grouped three different switches and passed them to ls: the l switch tells ls to use the long listing format (with detailed information about each separate file), the h switch tells ls to show file sizes in a human-readable format (kilobytes, megabytes or gigabytes where is the case instead of bytes) and finally, the a switch tells ls to also show the hidden files (the ones that start with a dot - in our case ., .. and .bashrc). You will have more in your home directory.

Regarding the dot and double dot: these are also files, in that they are virtually meaning the current directory and the parent directory, respectively. So, ls .. will list the contents of the parent directory, which in our case is /home/. ls . will list the contents of the current directory just like ls without arguments does. Bash uses expansion to replace these with their actual meaning. So issuing ls .. is read by Bash exactly like you would type ls /home/, since /home/ is the parent directory relative to what the current working directory is.

Absolute and relative paths

An absolute path is a complete path, and it always starts with the root directory (slash sign). /home/embryo/, /, /usr/bin/, these are all absolute paths. They specify the complete path up to a certain point.

On the other hand, a relative path will always take into consideration the current working directory. So if you are, say, in the directory /home/ and you want to change to, say, /home/embryo/Downloads you could do it like this:
$ cd /home/embryo/Downloads
In this example we specified the full path to the Downloads directory, or the absolute path. Notice the leading / sign for root. To do it using a relative path we would issue this command:
$ cd embryo/Downloads
Notice that we only specify the path from where we are, and there is no leading slash sign.

Go back to your home folder (use cd) and let's see how the double dot works. As I already mentioned, the double dot means the parent directory of the directory we're currently in. So let's say we want to go to the root directory again, but this time using double dot. Here's the command:
cd ../../
Which tells cd to go up to the parent directory, and then go up in the tree hierarchy one more time. You should be in the root directory now (check with pwd). The trailing slash in the above command is not necessary.

Performing simple tasks

Now let's focus on performing simple tasks like creating directories, view date and time, or simply playing around with some more basic commands.

Creating new files and directories
To create a new directory, we will use the mkdir (make directory) command. First, make sure you are in your home directory with pwd. If not, type cd to get there. Now, let's create a new directory:
debian$ mkdir myfolder
We created a new directory called myfolder. If you list your files now, your new folder should appear:
debian$ ls
Downloads Music myfolder my_stuff textfile
Now let's go inside our newly created folder, only this time using cd ~/myfolder/. The tilda sign signifies your home directory, and it expands into /home/your_username/. So issuing cd ~/myfolder/ is the same as issuing cd /home/embryo/myfolder/. Now let's create another folder, called docs:
$ mkdir docs
Now let's create an empty file using the touch command:
$ touch emptyfile
The touch command creates an empty file with the name of its argument if that file doesn't already exist, or it updates the last modification date and time if it exists. Now since we created an empty folder and an empty file, let's see how we can delete them.

To remove files or folders, we will use the rm command. To remove our newly created file type:
$ rm emptyfile
And to remove the docs directory:
$ rm -r docs
Notice that to remove a directory we need the -r switch.

Copying and moving files
Let's go back inside /home/your_username/myfolder/ and create a new directory and a new file:
mkdir newdir
touch newfile
Now let's use the cp command to copy the file newfile inside the directory newdir:
$ cp newfile newdir
This is the same as if we would've typed the following:
$ cp /home/embryo/myfolder/newfile /home/embryo/myfolder/newdir/
But in our first example we used a relative path.

Now let's create another file inside myfolder, and then move it to newdir:
touch file2
mv file2 newdir
We used the mv command to move it. Now let's create a new file inside myfolder, and rename it. Notice that in Linux renaming is accomplished using the mv command, they are one and the same thing. Let's create a file called mynewfile and rename it to file3 (we will list the contents of the directory after each step to see the changes):
$ touch mynewfile
$ ls
mynewfile newdir newfile
$ mv mynewfile file3
debian$ ls
file3 newdir newfile
Now let's go inside the newdir directory, and use the double dot to move file2 from there inside myfolder, and also rename it (we will list the contents after each step to reflect the changes):
$ cd newdir/
$ ls
newfile
$ mv newfile ../renamed_file
$ cd ..
$ ls
file3 newdir newfile renamed_file
So first we entered in newdir. The file newfile was there since we moved it earlier. Next, we moved it to the parent directory, but with a changed name, renamed_file. Next, we changed the working directory to the parent of newdir and we listed its contents. As a side note, if you copy or move a file and the new destination name is the name of a directory, the file will be moved inside that directory.

Date and time
To view the current system's date and time, we will use the date command:
debian$ date
Sun Dec 19 16:06:53 EET 2010
Notice that date can be invoked in various ways in order to format the output. For example, to show only the time in an HH:MM:SS format (hour, minute, second) we would use:
$ date +"%H:%M:%S"
16:09:52
The +"%H:%M:%S" parameter formats the output of the date command. Another useful command is cal, which will show a calendar:
debian$ cal
December 2010
Su Mo Tu We Th Fr Sa
1 2 3 4
5 6 7 8 9 10 11
12 13 14 15 16 17 18
19 20 21 22 23 24 25
26 27 28 29 30 31

More basic commands
You can try the whoami command, which will show your username:
$ whoami
embryo
The command uname is used to print system information. In combination with the -a (all) switch, it will print various information including hostname, kernel version, date and operating system:
$ uname -a
Linux debian 2.6.26-2-686 #1 SMP Thu Nov 25 01:53:57 UTC 2010 i686 GNU/Linux
The who command is used to show is logged on, the number of the tty (teletype terminal) or display they are using, and the date and time they logged in:
$ who
embryo :0 2010-12-19 07:55
Another useful command is uptime, which will show for how long the system has been running:
$ uptime
20:10:31 up 12:15, 1 user, load average: 0.02, 0.02, 0.00
To print a line of text to the screen we'll use the echo command:
$ echo 'Hello, world!'
Hello, world!
Searching for commands
In order to see the path in which a command is located we will use the whereis command, which will search in all the standard locations:
$ whereis bash
bash: /bin/bash /etc/bash.bashrc /usr/share/man/man1/bash.1.gz
Notice that whereis will not look into non-standard paths. Instead, we can use the which command for that:
$ which wesnoth
/home/embryo/usr/bin/wesnoth
More Useful CLI Commands
Using cat and less

The cat command is used to concatenate one or more files and print the result to the standard output. If only one file is specified as input, cat will print its contents to the screen. For example, here's the output of the cat /etc/mtab command, which prints the contents of the /etc/mtab file:
$ cat /etc/mtab
/dev/sda1 / ext3 rw,errors=remount-ro 0 0
tmpfs /lib/init/rw tmpfs rw,nosuid,mode=0755 0 0
proc /proc proc rw,noexec,nosuid,nodev 0 0
sysfs /sys sysfs rw,noexec,nosuid,nodev 0 0
procbususb /proc/bus/usb usbfs rw 0 0
udev /dev tmpfs rw,mode=0755 0 0
tmpfs /dev/shm tmpfs rw,nosuid,nodev 0 0
devpts /dev/pts devpts rw,noexec,nosuid,gid=5,mode=620 0 0
/dev/sda5 /floyd ext3 rw 0 0
So cat would be one way of vizualizing the contents of a file. However, if your terminal doesn't have scrollback history enabled, or you're in a tty and the file you're trying to read is too big, cat will only display the end of the file on a single page. This is where the less command is useful.

less will display the contents of a text file and allow you to navigate up and down to read it. Here are the keyboard shortcuts used by less:
  • J - scroll down one line (equivalent with Ctrl-N or down arrow)
  • K - scroll up one line (equivalent with Ctrl-P or up arrow)
  • Ctrl-V - scroll down one page (equivalent with Page Down)
  • Alt-V - scroll up one page (equivalent with Page Up)
To exit less press Q.

Using tar, gzip and bzip2

These are commands used to create archives and compressed files. tar is a tool which creates archives known as tar files, while gzip is a compressing tool which uses an advanced compression algorithm. bzip2 is an advanced compression tool which takes more time to compress/uncompress files, but it offers a better compression ratio, which results and smaller files. bzip2 is usually used to save disk space and Internet bandwidth.

To uncompress a .tar.gz file you would issue a command like the following:
tar -xzf archive.tar.gz
Where x stands for extract, z specifies that the compressed file is a gzip file, and f stands for the filename.

To uncompress a .tar.bz2 file you would use something like:
tar -xjf archive.tar.bz2
And finally, to create a .tar.gz compressed archive from a directory, use:
tar -czf output_file.tar.gz input_directory
This will create the compressed file output_file.tar.gz from the contents of input_directory, which will be the root directory.
The Power of the Shell
Standard GNU tools usually have two ways of specifying an option, the short and the long syntax. For example ls -a and ls --all will do the same thing, namely list all the hidden files in the current directory (files that start with a dot).

Parameters specified between the [ and ] brackets are optional, for example the synopsis ls [OPTION]... [FILE]... tells us that OPTION or FILE don't necessarily need to be specified.

Using TAB completion

TAB completion is one of the powerful features of the shell. Typing a few starting letters from a command and pressing TAB will auto-complete the whole command which starts with those few letters, or will offer the longest possible pattern in case more commands share the same letters in the beginning. For example, if we type ba followed by TAB, the shell will show us possible completion variants, like bash or batch. This may not look interesting for system commands which are usually short, but it is a feature which will come in handy in time.

Using control characters

The shell uses certain key combinations to perform certain actions. These key combinations are called control characters, and although they may be hard to learn at start, once you've mastered them you will find them faster and powerful than using the arrow keys or the Home/End and Page Up/Page Down keys. Most of these key combinations are used by Emacs too, a very powerful development environment (and not only). Also notice that these are easier to use for a person who knows blind-typing, since they don't require to move your fingers away from the typing position. The caret (^) sign in front of every key means "press Ctrl and the following key". Here is the list:
  • ^A - go to the start of line
  • ^E - go to the end of line
  • ^H - erase one character to the left (same effect as Backspace)
  • ^D - erase one character to the right (same effect as Delete, it also exits the shell if there is no character to delete))
  • ^U - erase everything from the cursor to start
  • ^K - erase everything from the cursor to end
  • ^P - bring the previous command in history
  • ^N - bring the next command in history
  • ^C - interrupt character, sends SIGTERM to the current application
You should familiarize with those, since once learned they will prove quite productive.

The ^N and ^P commands will cycle through the commands in the order in which they were given, so if for example you type ^N twice, the shell will bring the command you issued before the last command. ^D is also called the EOF (end-of-file) character and it is used to tell a program that the input has ended and it can return its output. As an example, you can type wc -l, which will count the lines in a file, but without providing the filename. In this case wc waits for you to enter lines and after you have ended type Ctrl-D to tell it you entered the text and want to know how many lines you typed in.

Make use of Bash history

Bash keeps a command history so you can recall commands at a later time. Some of the commands available for this include the use of !!, which will recall and execute the last command, !command_name, which will recall and execute the last command in history which starts with command_name or !?command_name?, which will recall and execute the last command in history which contains the string command_name.
Linux Directory Structure
Linux, just like UNIX, uses a tree hierarchical directory structure. The common standard directories on a Linux system are briefly overviewed below:
  • / - the root directory
    • /bin - contains important, vital utilities, like cp, ls or kill
    • /sbin - contains system administration utilities available to the root user, like ifconfig
    • /boot - contains the Linux kernel image used to boot the system
    • /dev - contains special files pointing to system devices
      • /dev/null - pseudo device used to pipe away unwanted data
    • /etc - contains configuration files for various applications
    • /home - contains home directories for system users
    • /lib - contains shared libraries available for all programs throughout the system
    • /media - mount points for devices
    • /mnt - mount points for filesystems
    • /root - home directory for the root superuser
    • /proc - virtual files providing system information
    • /tmp - stores temporary files
    • /var - logs, emails, printing jobs
    • /usr - all the programs which are not located in /bin or /sbin, documentation, manual pages, icons etc
      • /usr/bin - all binary applications not residing in /bin or /sbin
      • /usr/include - development headers used by the system
      • /usr/lib - shared libraries
      • /usr/local - applications which were not installed using the distribution's package manager; manually compiled applications go here
Environment Variables
Environment variables are special variables used by the shell and other applications to gather various information. For example, earlier in this tutorial we used the command echo $USER, which showed the currently logged in user. In this example, $USER is an environment variable. Some more examples include $HOSTNAME, $PATH, $PWD, $SHELL, $HOME, $LANG. And their output:
$ echo $HOSTNAME
debian
$ echo $PATH
/usr/local/bin:/usr/bin:/bin:/usr/games:/home/embryo/bin:/home/embryo/sym:
/home/embryo/usr/local/bin:/home/embryo/usr/bin
$ echo $SHELL
/bin/bash
$ echo $LANG
en_US.UTF-8
Some of them can be changed inside the ~/.bashrc file, for example the $PATH variable, which contains the locations in which to search for an executable file.
Bash Built-ins
As the name suggests, built-ins are commands which are provided by the Bash program itself rather than external commands provided by system binaries. To see all the built-ins included with Bash you can type help. Some examples would be:
  • . - or source, read and execute shell commands from a filename
  • alias - define new aliases
  • bg - place the specified job as argument in the background
  • fg - place the specified job as argument in the foreground and make it the current job
  • read - read one line of input from the standard input
  • if - conditional command; execute commands if the specified condition is true
  • while - loop command; execute commands as long as the condition specified is true
  • help - display all the available shell built-ins; help command_name will display help on the specified command
You can use the type command (which is also a built-in) to see if a command is a file or a shell built-in:
$ type type
type is a shell builtin
$ type bash
bash is /bin/bash
$ type cd
cd is a shell builtin
If the specified command is an alias, the output will be something like the following:
$ type ls
ls is aliased to `ls --color=auto -X'
In order to start an application in the background use the & sign after the command, e.g. man bash & will start the man command with the Bash manual page in background. To bring it in the foreground type fg, and then to put it back in the background press Ctrl-Z.
Pipes and Redirecting Output
Using pipes

Pipes are a powerful way to take the output of one command and feed it as input for another command. A pipe is represented by a vertical line (|). For example:
$ cat /etc/init.d/ifupdown | grep start
start|restart)
/etc/init.d/ifupdown-clean start
echo "Usage: $0 {start|stop|restart|force-reload}" >&2
The cat (concatenate) command is used to concatenate the content of one or more files and print the result to the output. Since in our example the only argument is a single filename, cat should print the contents of that file. The grep command is used to print lines that match a certain pattern, specified as a parameter.

The command we issued is cat /etc/init.d/ifupdown | grep start. The first command would normally print the entire contents of the file ifupdown to the output, but since we have a pipe here, the contents of the file will be the input for the grep start command. In the end, only the lines containing the text 'start' are printed. This command is equivalent to:
$ grep start /etc/init.d/ifupdown
Redirecting output

There are two common operators for redirecting output: > and >>. The first one will create a new file and write in it the output which was redirected. If the file already exists it will be rewritten. The second one will create a new file if it doesn't already exist and write in it the output which was redirected. If the file already exists, than the content will be appended to the already existing file.

Let's see how this works:
$ ls
file3 newdir newfile renamed_file
$ ls > list_files.txt
$ cat list_files.txt
file3
newdir
newfile
renamed_file
list_files.txt
First, we listed the contents of the current directory just to see what files are there. The next command, ls > list_files.txt will redirect the output of ls and will write it in the file list_files.txt. Next we show the contents of this file with cat list_files.txt. Now let's append the contents of ls -l to this file using >>, rather than rewriting it with the > operator:
$ ls -l >> list_files.txt
debian$ cat list_files.txt
file3
newdir
newfile
renamed_file
list_files.txt
total 8
-rw-r--r-- 1 embryo embryo 0 2010-12-19 16:21 file3
drwxr-xr-x 2 embryo embryo 4096 2010-12-19 16:24 newdir
-rw-r--r-- 1 embryo embryo 0 2010-12-19 16:15 newfile
-rw-r--r-- 1 embryo embryo 0 2010-12-19 16:21 renamed_file
-rw-r--r-- 1 embryo embryo 49 2010-12-19 19:20 list_files.txt
As you can see, the output of ls -l has been appended to list_files.txt.
Creating and Editing Files
In the previous section I showed how to create an empty file using touch, and now it's time to see how to create and edit text files using a text editor. For our example we'll use Nano, a user-friendly text editor that runs in a terminal. Nano is usually installed on any Linux distribution.

To create a new file with Nano, we will type in the following command:
$ nano newfile.txt
This will open up Nano so we can start editing our file:

Write some lines of text and then save the file using Ctrl+O followed by Enter. To quit Nano press Ctrl+X. Now you can view the content of your file using the cat command:
$ cat newfile.txt
some line of text
Getting Help
The -h and --help options

There are several ways of seeing how a command works and what are the valid arguments it can take. Usually all GNU tools provide the -h or --help parameters, which both do the same thing: show a brief description of the available parameters to the respective command and their meaning. For example, bash --help will show the Bash version and several options available to it. However, Bash is quite complex and very powerful, and such a short description usually won't suffice. This is where the manual pages get in the picture.

Manual pages

A manual page (or man page for short) usually contains all the options that a command accepts, with explanations for each of them, and a general description of the application. Only learning to get the habit of searching the man page is very helpful, since sometimes not even online searching will clarify a specific area like a man page does. To see a manual page for an application, just type man followed by the application's name, for example man bash or man man.

To navigate through the man page use the keys K (to scroll up) or J (to scroll down), or Ctrl-P (up) and Ctrl-N (down), or still Ctrl-V (down one page) and Alt-V (up one page). When you're done reading, type Q to exit man.

วันพุธที่ 15 ธันวาคม พ.ศ. 2553

things to do after install ubuntu

1. Update your system

sudo apt-get update && sudo apt-get full-upgrade

Now all your programs will run on the last version.

2. Anti-Virus

Windows equivalent : AVG AntiVirus, NAV, TrendMicro, F-Prot, Kaspersky, …

Ubuntu equivalent : ClamAV, Avast

ClamAV

sudo apt-get install clamav clamtk

Access it through System Tools → Virus Scanner .

Avast

wget http://files.avast.com/files/linux/avast4workstation_1.3.0-2_i386.deb && sudo dpkg -i avast4workstation_1.3.0-2_i386.deb

Access it through Accessories → avast! Antivirus .

3. Essential tools for compiling from sources

sudo apt-get install build-essential checkinstall cdbs devscripts dh-make fakeroot libxml-parser-perl check avahi-daemon

4. Java runtime environment

Java is a very important thing to install, now that many programs like Azureus need it to run. So type:

sudo apt-get install sun-java6-jre sun-java6-plugin equivs

5. Multimedia

Windows equivalent : windows media player, real player, vlc, mplayer

Ubuntu equivalent : vlc, mplayer, helix player

To have Ubuntu playing all kinds of stuff, you need to install many codecs. So on the Terminal, type:

* Installing vlc and mplayer (plays almost everything):

sudo apt-get install vlc mplayer

* Common packs

sudo apt-get install non-free-codecs libxine1-ffmpeg gxine mencoder mpeg2dec vorbis-tools id3v2 mpg321 mpg123 libflac++6 ffmpeg libmp4v2-0 totem-mozilla icedax tagtool easytag id3tool lame nautilus-script-audio-convert libmad0 libjpeg-progs libmpcdec3 libquicktime1 flac faac faad sox ffmpeg2theora libmpeg2-4 uudeview flac libmpeg3-1 mpeg3-utils mpegdemux liba52-dev

* Gstreammer 0.10

sudo apt-get install gstreamer0.10-ffmpeg gstreamer0.10-fluendo-mp3 gstreamer0.10-gnonlin gstreamer0.10-pitfdll gstreamer0.10-sdl gstreamer0.10-plugins-bad-multiverse gstreamer0.10-schroedinger gstreamer0.10-plugins-ugly-multiverse totem-gstreamer

* More programs

sudo apt-get install gstreamer-dbus-media-service gstreamer-tools ubuntu-restricted-extras

* Enable dvd support

sudo apt-get install libdvdcss2 && sudo /usr/share/doc/libdvdread4/./install-css.sh

* Flash

sudo apt-get install gsfonts gsfonts-x11 flashplugin-nonfree

6. Tweak your eyecandy

Ubuntu 10.04 comes with compiz fusion effects but it doesn’t offer a way to customize them.

In a terminal copy/paste this:

sudo apt-get install simple-ccsm

Now navigate to System → Preferences → Simple CompizConfig Settings Manager .

7. Missing Windows software?? Run Windows softwares in Linux!!!

Run Windows Applications such as 7zip, Google Sketchup, AutoCAD, Dreamwaver, Flash MX, Fireworks MX, IE6, IE7, Safari, Itunes, Windows Media Player and many more…

Play Windows Games in Linux like Age Of Empires, Call Of Duty, Diablo, Fear, Fallout, Far Cry, Grand Theft Auto, Half Life, Halo, Hitman, Max Payne, Need For Speed, Prince Of Persia, Sim City Star Wars, The Simsworld of warcraft , Tomb Raider, Warcraft, World Of Warcraft, Counterstrike and many other can be played. Install Playonlinux. It’s based on wine. Wine is a compatibility layer for running Windows programs in Linux.

sudo apt-get install wine playonlinux

8. App Runner

App Runner is a small open source utility that makes it very easy to run any type of program/executable/script on any distro/OS that uses the nautilus file manager: Debian/Ubuntu/Super OS/Fedora/etc

wget http://hacktolive.org/files/app_runner/App_Runner_0.2.deb && sudo dpkg -i App_Runner_0.2.deb

Then right-click the file -> Scripts -> Run This App or Run This App (root)

9. Clipboard Management

By Default in ubuntu when u copy something from an application and closes the application u will not be able to access it from the clipboard. And also when u copy severals text in serial u only have the last on available to you in the clipboard. To solve that install either of the following but Glipper is better because it supports plugins.

Glipper

sudo apt-get install glipper

Then right click ur panel → Add to Panel then drag Clipboard Manager to ur panel

Parcellite

sudo apt-get install parcellite

10. Archiver/ Packing software

Windows equivalent : winrar, zip, 7zip

Ubuntu equivalent : tar, unrar, p7zip, arj, unace

It’s bad when you don’t have Internet on your computer/notebook, but you have to pack/unpack something but the file format isn’t recognized by the system. To prevent from this bad situation, you can install a bunch of packing software by typing this on the terminal:

sudo apt-get install unace rar unrar zip unzip p7zip-full p7zip-rar sharutils uudeview mpack lha arj cabextract file-roller

11. Graphical web browser

Windows equivalent : Internet explorer, firefox, opera

Ubuntu equivalent : Firefox, opera, chromium

Opera

sudo apt-get install opera

Firefox (installed by default)

sudo apt-get install firefox

Chromium (open source equivalent of Google Chrome)

sudo apt-get install chromium-browser chromium-browser-l10n

12. Download Manager

Windows equivalent : Free download manager

Ubuntu equivalent : Multiget

MultiGet

It is a http/ftp downloader with a nice GUI for linux desktop users. It can run on almost all desktops without any configuration. It has many powerful functions comparing to others.

sudo apt-get install multiget

Access it through Applications → Internet → MultiGet .

13. Graphical Email client

Windows equivalent : Outlook

Ubuntu equivalent : Evolution, Thunderbird

Evolution (installed by default in Maverick)

sudo apt-get install evolution

Access it through Applications → Internet → Evolution Mail .

Thunderbird

sudo apt-get install thunderbird

Access it through Applications → Internet → Mozilla Thunderbird Mail/News .

14. Instant Messanging protocal clients

Windows equivalent : MSN messenger, Yahoo messenger, QQ, AIM, Gtalk, ICQ,IRC

Ubuntu equivalent : Empathy, Pidgin, emesene

Empathy IM Client (installed by default)

Add the related launchpad repository :

sudo add-apt-repository ppa:telepathy/ppa && sudo apt-get update


Then install it by running the following :

sudo apt-get install empathy telepathy-mission-control-5 telepathy-gabble telepathy-butterfly telepathy-haze telepathy-idle telepathy-salut telepathy-sofiasip libtelepathy-farsight0 python-tpfarsight galago-eds-feed python-galago python-galago-gtk msn-pecan


Access it through Applications → Internet → Empathy IM Client .

Pidgin

Pidgin is an easy to use and free chat client used by millions. Connect to AIM, MSN, Yahoo, and more chat networks all at once. Supported chat networks: AIM, Bonjour, Gadu-Gadu, Google Talk, Groupwise, ICQ, IRC, MSN, MySpaceIM, QQ, SILC, SIMPLE, Sametime, XMPP, Yahoo!, Zephyr

Add the launchpad repository :

sudo add-apt-repository ppa:pidgin-developers/ppa && sudo apt-get update


Then install it :

sudo apt-get install pidgin pidgin-data pidgin-lastfm pidgin-guifications msn-pecan pidgin-musictracker pidgin-plugin-pack pidgin-themes


Access it through Applications → Internet → Pidgin Internet Messenger .

Emesene only for MSN Messenger.

Add the launchpad repository :

sudo add-apt-repository ppa:bjfs/ppa && sudo apt-get update


Then install it :

sudo apt-get install emesene


Access it through Applications → Internet → Emesene .

15 . VOIP

Windows equivalent : skype

Ubuntu equivalent : skype

Skype

sudo apt-get install skype

Access it through Applications → Internet → Skype.

16. Viewing PDF files

Windows equivalent : Adobe Reader

Ubuntu equivalent : Adobe Reader

Adobe Reader

sudo apt-get install acroread acroread-fonts

Access it through Applications → Office → Adobe Reader.

17. Adobe Air

Adobe Air is also an important essential utility. Type in the codes one after another.

wget http://airdownload.adobe.com/air/lin/download/latest/AdobeAIRInstaller.bin

chmod +x ./AdobeAIRInstaller.bin


sudo ./AdobeAIRInstaller.bin

Access it through Applications → Accessories → Adobe Air Application Installer.

18. Music / MP3 / OGG Players

Windows equivalent : iTunes, Winamp

Ubuntu equivalent : Rhythmbox, Banshee, Amarok

Rhythmbox

sudo apt-get install rhythmbox

Access it through Applications → Sound & Video → Rhythmbox Music Player.

Banshee

sudo apt-get install banshee banshee-extension-ubuntuonemusicstore libappindicator0-cil banshee-extension-appindicator banshee-extension-lyrics banshee-extension-mirage

Access it through Applications → Sound & Video → Banshee Media Player.

Amarok

sudo apt-get install amarok amarok-common

Access it through Applications → Sound & Video → Amarok.

19. Hard Disk Partitions Manager

Windows equivalent : Symanted Partition Magic

Ubuntu equivalent : GParted

GParted

sudo apt-get install gparted ntfsprogs menu ntfs-config

Access it through System → Administration → Partition Editor.

20. Vector Graphics Editor

Windows equivalent : Adobe Illustrator

Ubuntu equivalent : Inkscape

Inkscape

sudo apt-get install inkscape

Access it through Applications → Graphics → Inkscape Vector Graphics Editor.

21 – Image Editor

Windows equivalent : Adobe Photoshop, Paint.Net

Ubuntu equivalent : GIMP

GIMP

Add the launchpad repository :

sudo add-apt-repository ppa:matthaeus123/mrw-gimp-svn && sudo apt-get update


Then install it with the following command :

sudo apt-get install gimp gimp-data gimp-plugin-registry gimp-data-extras


Access it through Applications → Graphics → GIMP Image Editor.

PINTA

Add the launchpad repository :

sudo add-apt-repository ppa:moonlight-team/pinta && sudo apt-get update


Then install it with the following command :

sudo add-apt-repository ppa:moonlight-team/pinta && sudo apt-get update


Access it through Applications → Graphics → Pinta Image Editor.

22. 3D Graphics Applications

Windows equivalent : 3D Studio MAX

Ubuntu equivalent : Blender

Blender

It is very simple to use and it has many tutorials at its homepage.

sudo apt-get install blender

Access it through Applications → Graphics → Blender (windowed).

23. Simple Yet Advanced Text Editor

Windows equivalent : Notepad ++

Ubuntu equivalent : GEdit

GEdit

sudo apt-get install gedit gedit-plugins

Access it through Applications → Accessories → Text Editor.

24. Office Applications

Windows equivalent : Microsoft Office

Ubuntu equivalent : OpenOffice

OpenOffice

Open office comes with word processor (Word), presentation (PowerPoint), and spreadsheet (Exel)

sudo apt-get install openoffice.org

Access it through Applications → Office

25. Microsoft Visio

Windows equivalent : Microsoft Visio

Ubuntu equivalent : Dia

Dia

sudo apt-get install dia

Access it through Applications → Graphics → Dia Diagram Editor

26. Microsoft Project

Windows equivalent : Microsoft Project

Ubuntu equivalent : OpenProj

OpenProj

wget http://nchc.dl.sourceforge.net/sourceforge/openproj/openproj_1.4-2.deb && sudo dpkg -i openproj_1.4-2.deb

Access it through Applications → Office → OpenProj

27. Development IDE

Windows equivalent : Dreamweaver

Ubuntu equivalent : Quanta, Kompozer, NetBeans

Quanta

sudo apt-get install quanta

Access it through Applications → Programming → Quanta Plus

Komposer

sudo apt-get install kompozer nvu

Access it through Applications → Internet → Kompozer

NetBeans

sudo apt-get install netbeans

Access it through Applications → Programming → NetBeans IDE

28. Source Control Management

Windows equivalent : TortoiseSVN

Ubuntu equivalent : RabbitVCS

RabbitVCS

Add the launchpad repository :

sudo add-apt-repository ppa:rabbitvcs/ppa && sudo apt-get update


Then install it :

sudo apt-get install rabbitvcs-nautilus

killall nautilus


Right Click on any folder or file and access the RabbitVCS submenu

29. Graphical FTP clients

Windows equivalent : CuteFTP, SmartFTP

Ubuntu equivalent : FileZilla

FileZilla

This is great FTP program, very complete, in my opinion, the best one for linux.

On the terminal type:

sudo apt-get install filezilla filezilla-common

Access it through Applications → Internet → FileZilla FTP Client.

30. P2P Clients / Servers, File Sharing

Windows equivalent : utorrent, azureus, emule, Limewire, Imesh..

Ubuntu equivalent : Deluge, azureus, amule, Frostwire

Bittorent clients

Deluge (written in python)

Add the launchpad repository :

sudo add-apt-repository ppa:deluge-team/ppa && sudo apt-get update


Then install it :

sudo apt-get install deluge-torrent


Access it through Applications → Internet → Deluge Torrent.

Azureus:

Azureus uses Java to run, very complete but a bit heavy

sudo apt-get install azureus

Access it through Applications → Internet → Azureus.

Emule Donkey Clients

Amule

Add the launchpad repository :

sudo add-apt-repository ppa:happyaron/amule-dlp && sudo apt-get update


Then install it with the following command :

sudo apt-get install amule-dlp amule-dlp-gnome-support amule-dlp-utils-gui amule-dlp-daemon


Access it through Applications → Internet → aMule.

P2P Clients

Frostwire

It is a BitTorrent + Gnutella network clients. It is simple to use similar to limewire.

sudo apt-get install frostwire

31. Programs for CD burning with GUI

Windows equivalent : Nero, Roxio Easy CD Creator

Ubuntu equivalent : K3b, Brasero

K3b

Nero is available for linux,but its not free.A trial is available for 1 month usage and later it asks or activation code.But K3B is as good as Nero.Have a good feature set as Nero.

sudo apt-get install k3b k3b-data libk3b6

Access it through Applications → Sound & Video → K3B.

Brasero (installed by default in )

sudo apt-get install brasero

Access it through Applications → Sound & Video → Brasero Disc Burning .

32. Mountings ISO files

Windows equivalent : Alcohol

Ubuntu equivalent : acetoneiso

Acetoneiso

The best one for linux ACETONEISO, which is similar to ALCOHOL in windows. Its supports almost all formats. AcetoneISO is CD/DVD image manipulator for Linux.Using this tool it is very easy to Mount and Unmount ISO,MDF,NRG Images . I dont think its available in ubuntu repository.

sudo apt-get install libksba8 libenca0 libtwolame0 fuseiso kommander p7zip-full gnupg-agent gnupg2 pinentry-qt mencoder cdrdao && wget http://darkstar.ist.utl.pt/getdeb/ubuntu/jaunty/ac/acetoneiso_2.1.1-1~getdeb1_i386.deb && sudo dpkg -i acetoneiso_2.1.1-1~getdeb1_i386.deb

33. Install Vista like gadgets

Windows equivalent : Vista Sidebar, Google gadgets, Yahoo widgets

Ubuntu equivalent : google-gadgets, Screenlets

Google gadgets

sudo apt-get install google-gadgets-gtk

This will complete the installation.

Now press Alt+F2, and type “ggl-gtk” to start them. You should see a small icon show up in your system tray, and a sidebar. Right click on any of them and select ‘Add Gadgets’ to show a menu. If you’d like to have Google Gadgets start automatically, go to System – Preferences – Session, click ‘Add’, paste ‘Google Gadgets’ for the name and ‘ggl-gtk’ for the command. Click OK and Close, and you’re good to go.

Screenlets

sudo apt-get install sreenlets

34. Google Desktop

Google Desktop allows one to full text search of a user’s e-mail, computer files, music, photos, chat, and Web pages viewed,OpenOffice documents , PDF files and more . Now similar tools already existed on Linux like beagle (supported by novell ) , meta tracker etc . However Google Desktop search is not based on any of these tools and uses its proprietary algorithms to search for files on the computer ,also being 1.0 release and more stable then these products it could be preferred over tools like beagle .

To install Google Desktop Search type the following command in the terminal window : -

sudo apt-get install google-desktop-linux

Access it through Applications → Google Desktop → Google Desktop

Now after choosing appropriate option through Applications → Google Desktop → Google Desktop Preferences, you would find Google Desktop icon in the bar at the top of the screen , now it would automatically scan and index files on computer and store it in local database which could be searched using web browser .

35.  Photo Management

Google Picasa

Google Picasa is an extremely professional good looking photo management application available on Windows ,Linux and Mac OS. Now Google Picasa has a number of features that many photo management software on Linux dont have further Google Picasa looks very user friendly as compared to similar open source application available on linux . Now Google Picasa for Linux is not a native linux application but runs on Linux thru application layer called wine which allows many windows application to run flawlessly on Linux.

Now to install Google – Picasa type the following command in the terminal window

wget http://dl.google.com/linux/deb/pool/non-free/p/picasa/picasa_3.0-current_i386.deb && sudo dpkg -i picasa_3.0-current_i386.deb

Access it through Applications → Graphics → Picasa → Picasa

36. Map Viewing and Management

Google Earth

To install Google Earth type the following command in the Terminal Window.

sudo apt-get install googleearth

After downloading is over you will get a screen like this press ¨Yes¨ to accept the license agreement and complete software installation.

Now you can launch Google Earth from Application → Internet → Google Earth

37. Gmail Notification

Checkgmail

If you would like to get notified when you have a new mail in your google mail account, checkgmail is for you. To install Checkgmail type the following command in the Terminal Window.

sudo apt-get install checkgmail

Now you can launch it from Application → Internet → CheckGmail

38. Configure Firewall

If you are concern about your security, then it is pertinent that you activate the firewall and prevent any unauthorized access to your computer. UFW is installed by default, but if you need a graphical interface, install GUFW.

Now to install UFW type the following command in the terminal window

sudo apt-get install gufw

39. Gnome Do

Gnome Do is a small application that allows you to search and do things faster and more efficiently in your Ubuntu machine. It is similar to QuickSilver in Mac and Launchy in Windows. For those who have not tried Gnome Do before, it might take some time for you to get used to it. But once you’re hooked to it, there will be no turning back for you.Gnome Do also comes with a dock interface that you can use it like any other docks.

sudo apt-get install gnome-do

Now you can launch it from Application → Accessories → Gnome Do

40. Ubuntu Tweak

Ubuntu Tweak allows you to tweak your system settings, all in one place. You can install new applications, customize your desktop settings, configure your startup applications, changing the system filetype association and many more tweaks in this single application.

Add the launchpad repository :

sudo add-apt-repository ppa:ubuntu-tweak-testing/ppa && sudo apt-get update


Then install it with the following command :

sudo apt-get install ubuntu-tweak


Then access it through Applications → System Tools → Ubuntu Tweak

Extras—> Games

When I say games I mean installed games (preinstalled) on the distro. Windows usually comes with silly games like minesweeper, freecell, pinball, solitaire…etc. On the other hand Ubuntu 10.10 “Maverick Meerkat” has games like gbrainy and sudoku well it also has solitaire and minesweeper. In addition to that you can install a lot of games fron getdeb.com, allmyapps.ubuntu.com. One of my favorite game is ‘Secret Maryo Chronicles’ it is clone version of Super Mario.

Secret Maryo Chronicles

To install open terminal and type-

sudo apt-get install smc

CAD software

Windows equivalent : AutoCAD, BricsCAD

Ubuntu equivalent : BricsCAD

AutoCAD can be run using wine (as discussed above) but sometimes it lacks performance. BricsCAD can be used instaead of AutoCAD. It has similar functions of AutoCAD. Bricscad is the number one DWG CAD alternative offering a complete and recognizable feature set to professional users. Bricscad reads and writes the DWG format and offers high compatibility with AutoCAD® 2010. Bricscad has a very recognizable intuitive user interface and requires no extra training.

You can try out Bricscad for free (30 days): Download Bricscard for Linux (includes .deb, .rpm and tar.gz files

focus writer

focus writer

FocusWriter 1.3.0 Released – Distraction free writing on Ubuntu

For those of you unaware, I received my Bachelors in Theater Arts just a few months ago. I wrote a number of plays and sketches, both for classes and to actually be produced, and I wrote all of them on Ubuntu.
Unfortunately I was never able to settle down into anything more specialized than OpenOffice. While certainly full featured, typing in nothing more than a Word Processor is not, for everyone, entirely conducive to the writing process. Distractions abound, and it is difficult to really focus on what you’re doing even if you have the will power, simply because of the wide range of flashing indicators and bouncing icons and such. Even the OpenOffice interface offers formatting and other distractions. As many of you are fully aware, it takes 2 clicks to get something as simple as a word count, which is horribly distracting to have to change your flow to grab the mouse and click the menu. I turned to writing drafts by hand, and only used the computer for second and third drafts.
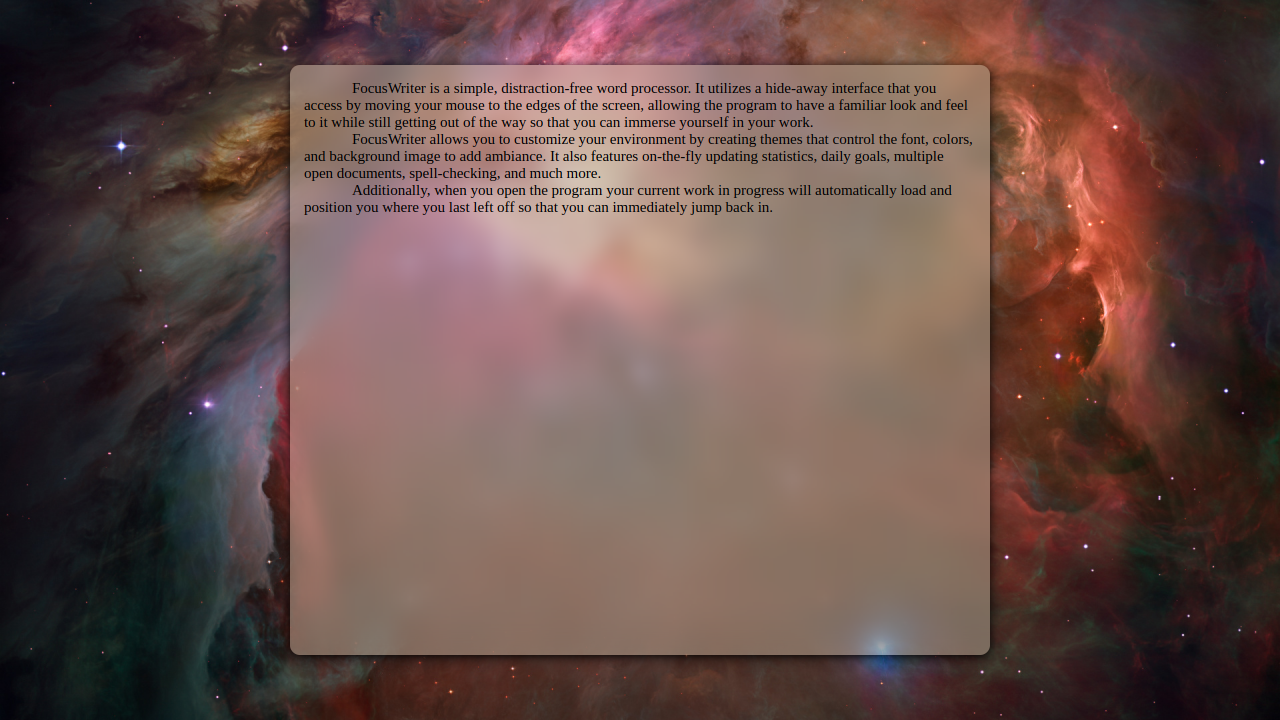
However, recently I’ve been turned onto writing software with little or no interface available. We’ve written about PyRoom before, a simple writer written in Python. I actually literally just installed it again last night, but today another bit of software showed up in our inbox, FocusWriter.

FocusWriter suits me a bit more, because of a few key added features that is has over PyRoom and other available software.
Featured and Yet Simple

The first time you launch FocusWriter, you get a plain, empty grey screen. While not exactly the most attractive colors to start with, these are totally changeable. Unfortunately, how to change things like this is not immediately apparent. I tried just about every key combo that popped into my mind, but couldn’t find any controls. Once I stopped being stubborn and actually read the instructions on the website, I realized that the controls were not hidden by a key press, but by simply tossing your mouse at the top or bottom of the screen.

This, I think, is rather clever, although it took me long enough to figure it all out.
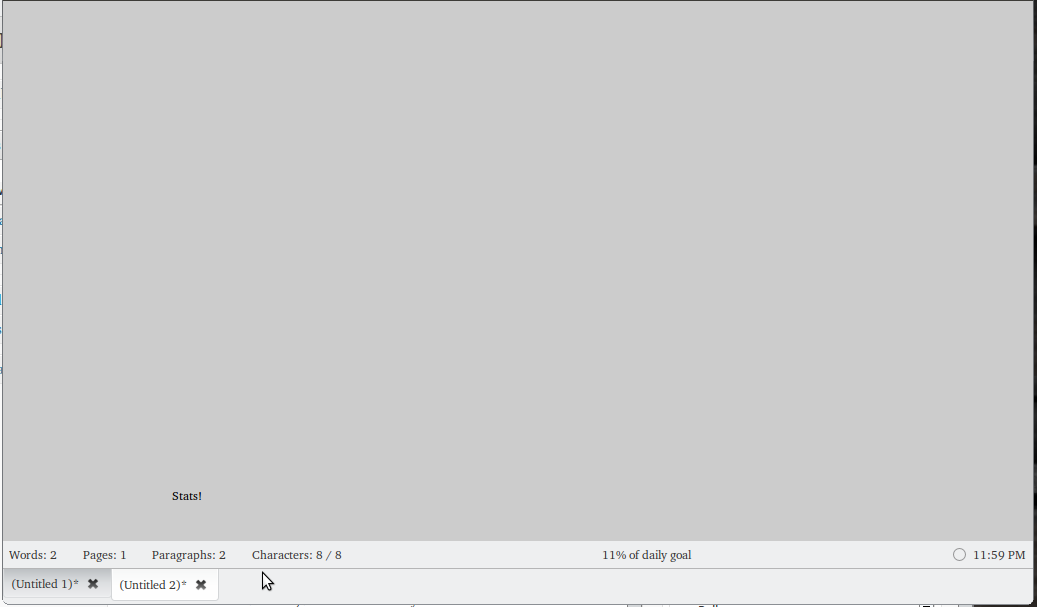
There are a number of nice little touches to this simple interface. When the mouse is brought to the bottom, you get this view:

This gives you word count, page count, paragraph count, and character count, as well as percentage of Daily Goal accomplished and the time. All the things you might need, but not in your face distracting you. This is great, as when you need this info, it’s very easy to get out, but is otherwise out of sight.

Also cool is that there is the ability to add basic formatting. Often this is left out of apps like this to avoid any distraction, but sometimes you need some of the basics, and FocusWriter delivers (apparently added in the most recent version only)
The Rough Edges
Like any app, there are a few areas that I think could use a bit of improvement.
First up, when I first installed FocusWriter there was absolutely nothing. No tutorial, no hints, no nothing. I don’t know if there is supposed to be instructions that just aren’t there and it’s a bug or what, but help out the user and drop some text in there. If it’s just me and it installed funny, then ignore this paragraph everyone. :D
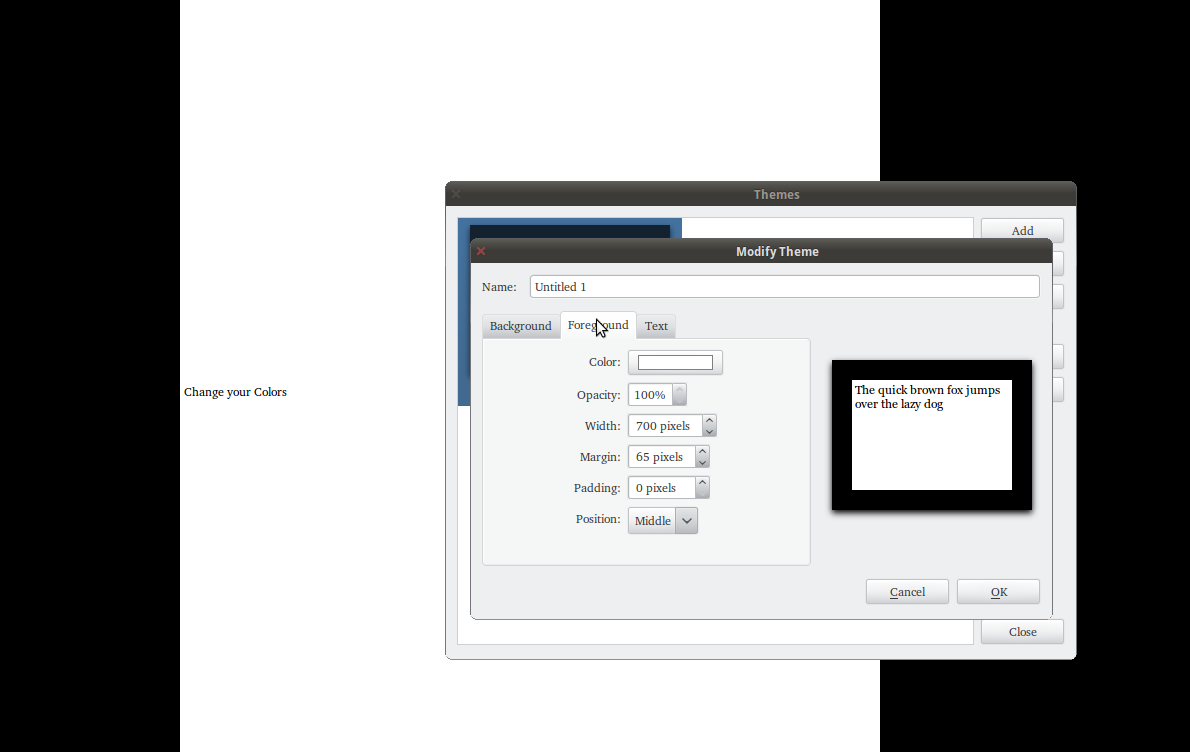
Secondly, while there is a button for installing themes (the source of which I couldn’t particularly found) there are none included besides the bland grey. While the point is to keep you from being distracted, something that’s at least pleasant to look at would be nice.

The fact that the included color palette looks like vomit doesn’t help, as it means you have to totally distract yourself for a bit screwing around with colors.
Speaking of included palette:

Ew. For what reason are those colors available?
However, those are minor minor complaints about an otherwise great app. The newest version literally came out NOW, as in the 23rd, so it is up to date and ready to go.
Features:
  • Hiding interface
  • Themes
  • Live Statistics
  • Daily Goals (time and word count)
  • Timers and alarms
  • Very adjustable interface
  • Spell Check as you type
  • Dictionary support
  • Multiple documents can be open in tabs
Installation:
Perhaps in it’s coolest feature, FocusWriter is available in Mac, Windows, and Linux all downloadable from their website. For Ubuntu, there is an available PPA, and you can install from PPA like so:
  • sudo add-apt-repository ppa:gottcode/gcppa
  • sudo apt-get update
  • sudo apt-get install focuswriter
Now all I need is an full featured writing software like Scrivener that doesn’t look like crap… anyone know of anything?

Linux to Enter Law Office Through Netbooks?

I have posted several times before about how I see Linux entering the law office market, whether through big firms or through the back office (i.e. the servers).  However, it has become apparent in the past few months that there is another inroad developing that may fast-track the OS into the legal market.  This is the introduction and rise of the netbook.
More and more laptop users (and road warrior lawyers) have been discovering that they use their portable computers mainly for e-mail and web based applications.  Thus people have been buying netbooks as secondary machines in order to have lightweight, highly portable computers for travel (here is a great post on the development of the netbook that explains this phenomenon).  These netbooks often come with 512Mb to 1Gb of RAM, slower, more energy efficient microprocessors (Intel’s Atom for the most part), which means that the OS that runs on it must be lean and mean, a term seldom, if ever, applied to a Microsoft product.  In fact, Vista, if it does run on a netbook, runs poorly, and Redmond has, as a result, made XP available to hardware companies for another two years.
Linux, on the other hand, because it can do more with fewer resources, is really the better OS candidate for netbooks.  Also, because the machines are designed (and intended) to be used with web-based applications, they are more platform-independent, and thus do not run into the problems that Linux presents on the lawyer desktop (e.g. the lack of compatible verticle market apps like case management and bankruptcy software).   The lack of cost for Linux also keeps the overall price down for netbooks and can make them more attractive.
I have been using the open source Mozilla Firefox web browser for years now and have found it easy to learn and use, which also goes for their e-mail client, Thunderbird.  Google Docs and other web-based apps are already being used by many lawyers, and even if you need an offline solution, OpoenOffice is a great alternative that is easily downloaded and installed on the netbook (at least in the Ubuntu distribution, which is what is being installed on most Linux netbooks).  The learning curve is not steep at all, and the increasing usage of Linux netbooks by lawyers may well overcome the phobia to change and encourage them at least to consider using Linux on their office systems.  We can only hope.

Linux in the Law Office

It seems that every year there are claims by some industry pundits that this is the “Year of Linux.” Obviously, they have been wrong to date. However, a couple things have happened recently that have led me to believe that, even if not in 2007, then by the end of the decade, Linux will have its year.
The first event was the rise of the Linux distribution Ubuntu. This is a truly amazing product, and I have been trying it out on an old machine at home for the last couple of weeks. What is great about it, as compared to Linux distributions in the past, is that it contains a complete system of OS and applications that would be enough for most users, and installs with a few clicks of the mouse; no geeks needed. You get OpenOffice, an open source answer to Microsoft Office that reads and writes the format (although not that of Office 2007 yet), FireFox web browser, an e-mail client and Outlook clone, media player, CD/DVD player/burner, lots of games, and the like. You are ready to go “right out of the box,” so to speak.
The second event was Dell’s decision to sell Ubuntu systems (desktops and laptops) to the home user. This is a major move by a major PC vendor (one often used by lawyers and the ABA) away from exclusively Windows platforms, and is the first crack in the ice. If other vendors get on board, more peripheral makers will write Linux drivers for their devices, and we will all be closer to a “Linux Year.” The questions still is, though, is Linux an option in the law office?
Despite the “out of the box” nature of the Ubuntu Linux distribution, today’s lawyer needs to do more than create an Office document, send e-mail, or surf the net. He or she needs to use case management, litigation support, and billing/accounting software as well. QuickBooks and Quicken are available for Windows and the Mac, but not Linux, unless it is an enterprise solution on a Linux server. The same is true Time/Billing Matters from Lexis/Nexus, Abacus Law, Timeslips, and the like. Just go to your software vendor’s web site and click on System Requirements to see for yourself. There is some good news for those who use Lotus Notes for everything. That will run on Linux, but how many solo and small firms have made that investment? Unless all you do on your office computer is use Office, Outlook, e-mail, and web browsing (or have the money for Lotus Notes), I just do not see where Linux is ready for the law office desktop. The only exception may be servers, as you can save money on hardware (Linux is not nearly as resource hungry as Windows, so it doesn’t need the latest, speedy processor and lots of RAM), but I would not recommend installing and configuring the Linux server software yourself; once you hire a consultant, the savings evaporate.
One possible use would be in the recycling of old office computers by bringing one home and putting Ubuntu Linux on it. Unless you or your kids are heavily into gaming, it should be of good use there, and there are thousands of software packages that can be downloaded and installed automatically by the system if there is something you need that is not on the desktop initially. I would suggest printing to a device on your home network, rather to one plugged into the Linux box, as printer drivers can also be scarce.
I expect that Linux will be ready for us once it becomes a great enough force in the market to be reckoned with, and then our software budgets will shrink dramatically. In the meantime, stick to your Windows PCs. If something changes, I will let you know. For a spirited discussion of whether this is the “Year of Linux,”